
This lab follows a microservices demo from three Ubuntu machines to an application deployed on Kubernetes. Rancher provides the interface for creating the cluster and registering its nodes.
The notes and screenshots come from my 2020 demo. The package repositories and Rancher screens have changed since then. The sequence is still useful to read, but it needs a fresh lab run before it can serve as a current tutorial.
The three nodes have different jobs
The original cluster assigned these roles:
| Node | Roles |
|---|---|
kserver1 | etcd, control plane |
kserver2 | etcd, control plane, worker |
kserver3 | etcd, worker |
The control plane manages the cluster. etcd stores its state. Workers run the application workloads. A node can have more than one role, as kserver2 does here.
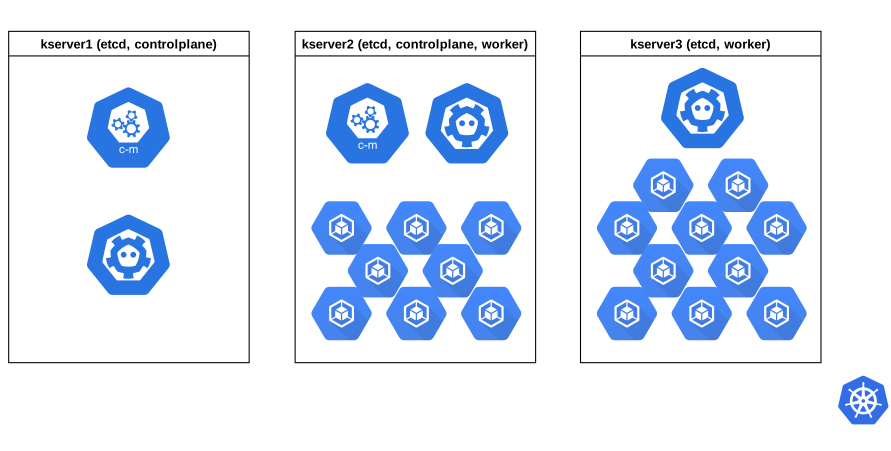 Kubernetes diagram
You can follow the recorded demo alongside the commands and screenshots below.
Docker came first in this lab
These commands came from the Docker installation flow used at the time. They include an old apt-key setup and assume an amd64 Ubuntu machine. For a new host, follow the current Docker Ubuntu instructions instead of copying this repository configuration.
The first step removed conflicting packages on the lab machines:
sudo apt remove docker docker-engine docker.io containerd runc
That changes the container software installed on the host. Don’t treat it as a routine preparation step for a machine already running containers.
The remaining historical installation commands were:
sudo apt install apt-transport-https ca-certificates curl gnupg-agent software-properties-common

curl -fsSL https://download.docker.com/linux/ubuntu/gpg | sudo apt-key add -
sudo apt-key fingerprint 0EBFCD88

sudo add-apt-repository "deb [arch=amd64] https://download.docker.com/linux/ubuntu \
$(lsb_release -cs) \
stable"

sudo apt update
sudo apt install docker-ce docker-ce-cli containerd.io
The Docker packages were not pinned, so running this again would not reproduce the same versions. The Kubernetes runtime setup has changed, too. A current installation needs a compatible CRI runtime; Docker Engine needs an adapter to provide that interface. The Kubernetes runtime documentation explains that requirement.
Apply the network setting from the file you just wrote
The lab enabled bridge filtering on all three nodes. Load the bridge module before setting its parameter:
sudo modprobe br_netfilter

cat <<EOF | sudo tee /etc/sysctl.d/k8s.conf
net.bridge.bridge-nf-call-iptables = 1
EOF

sudo sysctl -p /etc/sysctl.d/k8s.conf
The filename in the last command matters. The old article used sysctl -p on its own, which reads /etc/sysctl.conf rather than the new file in sysctl.d. See the Ubuntu sysctl manual for that behavior. A rebuild should also check that the required module loads after reboot.
The original setup disabled swap on every server:
sudo swapoff -a
sudo vi /etc/fstab
swapoff changes the running system. Editing the relevant swap entry in /etc/fstab prevents that entry from enabling it again at boot. Leave unrelated mounts alone, and check how the VM actually manages swap before changing the file.
The kubectl package commands are historical
The lab installed kubectl version 1.15.7-00 from the old Kubernetes repository:
curl -s https://packages.cloud.google.com/apt/doc/apt-key.gpg | sudo apt-key add -

cat <<EOF | sudo tee /etc/apt/sources.list.d/kubernetes.list
deb https://apt.kubernetes.io/ kubernetes-xenial main
EOF

sudo apt update
sudo apt install -y kubectl=1.15.7-00
That repository is no longer available. Kubernetes removed it in March 2024. For a new lab, choose a client compatible with the cluster and use the current kubectl installation instructions.
Rancher manages the cluster from a separate interface
The original demo started Rancher as a privileged Docker container:
docker run -d --name rancher --privileged --restart=unless-stopped \
  -p 80:80 -p 443:443 rancher/rancher:stable
This is the original command, not a pinned release you can use to reproduce the old environment. The stable tag can move, and the exact Rancher build was not recorded. Rancher’s single-node Docker installation is intended for testing and development. A production setup needs the supported installation design for its chosen release.
The following screenshots keep the original flow. Start by setting the administrator password and the URL that the nodes will use to reach Rancher:
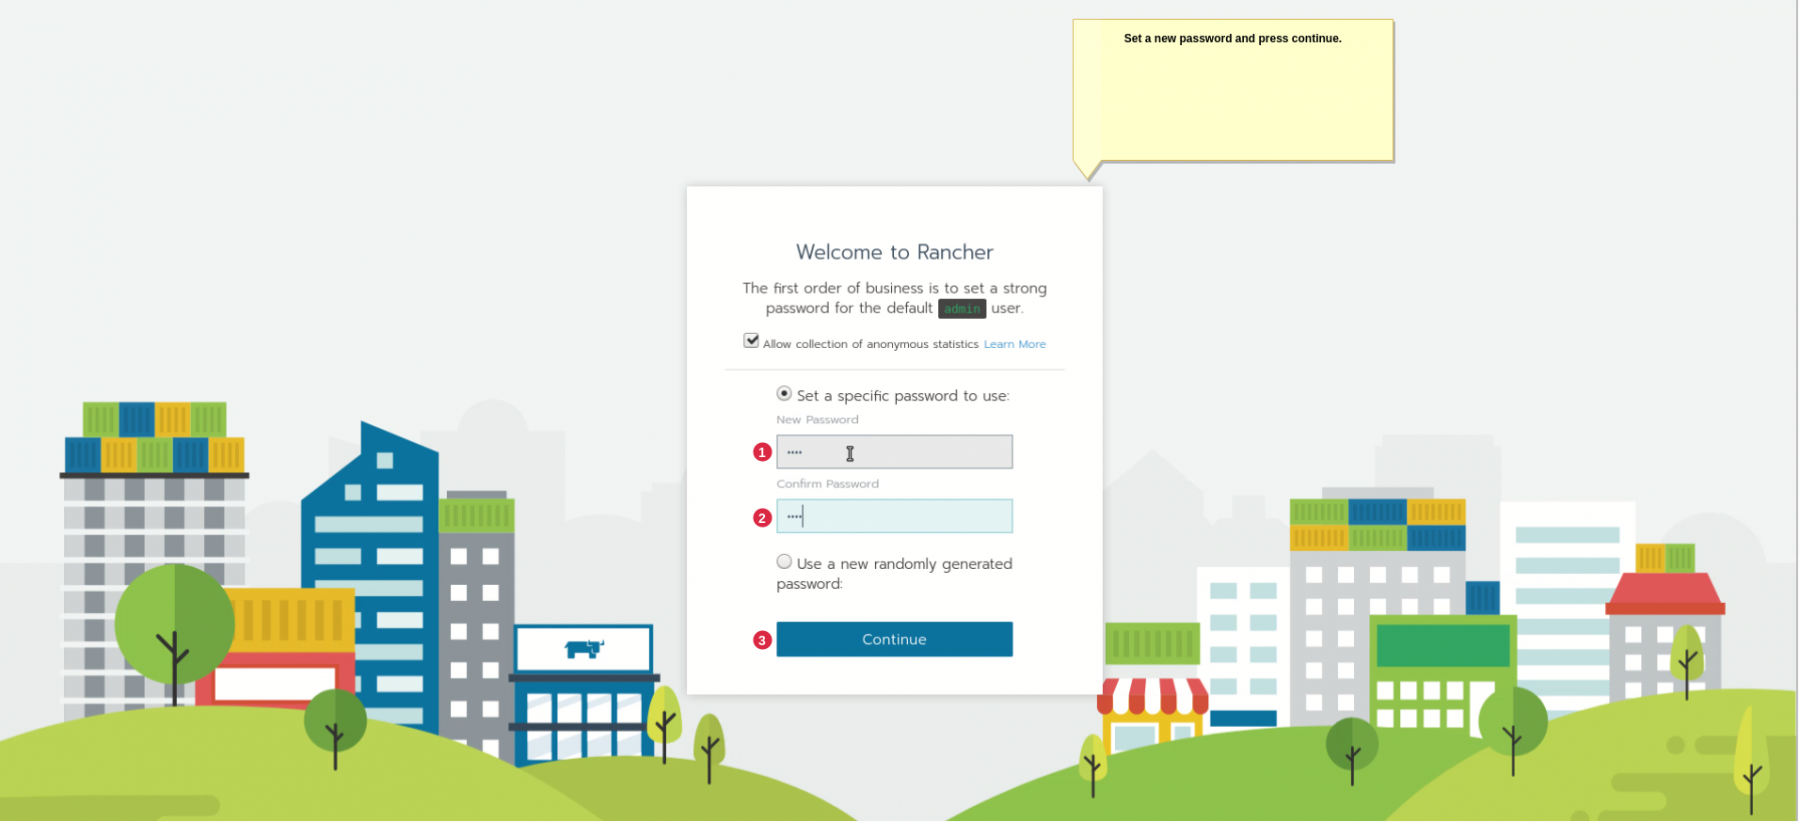 Set a new password
 Setup Rancher URL
Then create the cluster and give it a name:
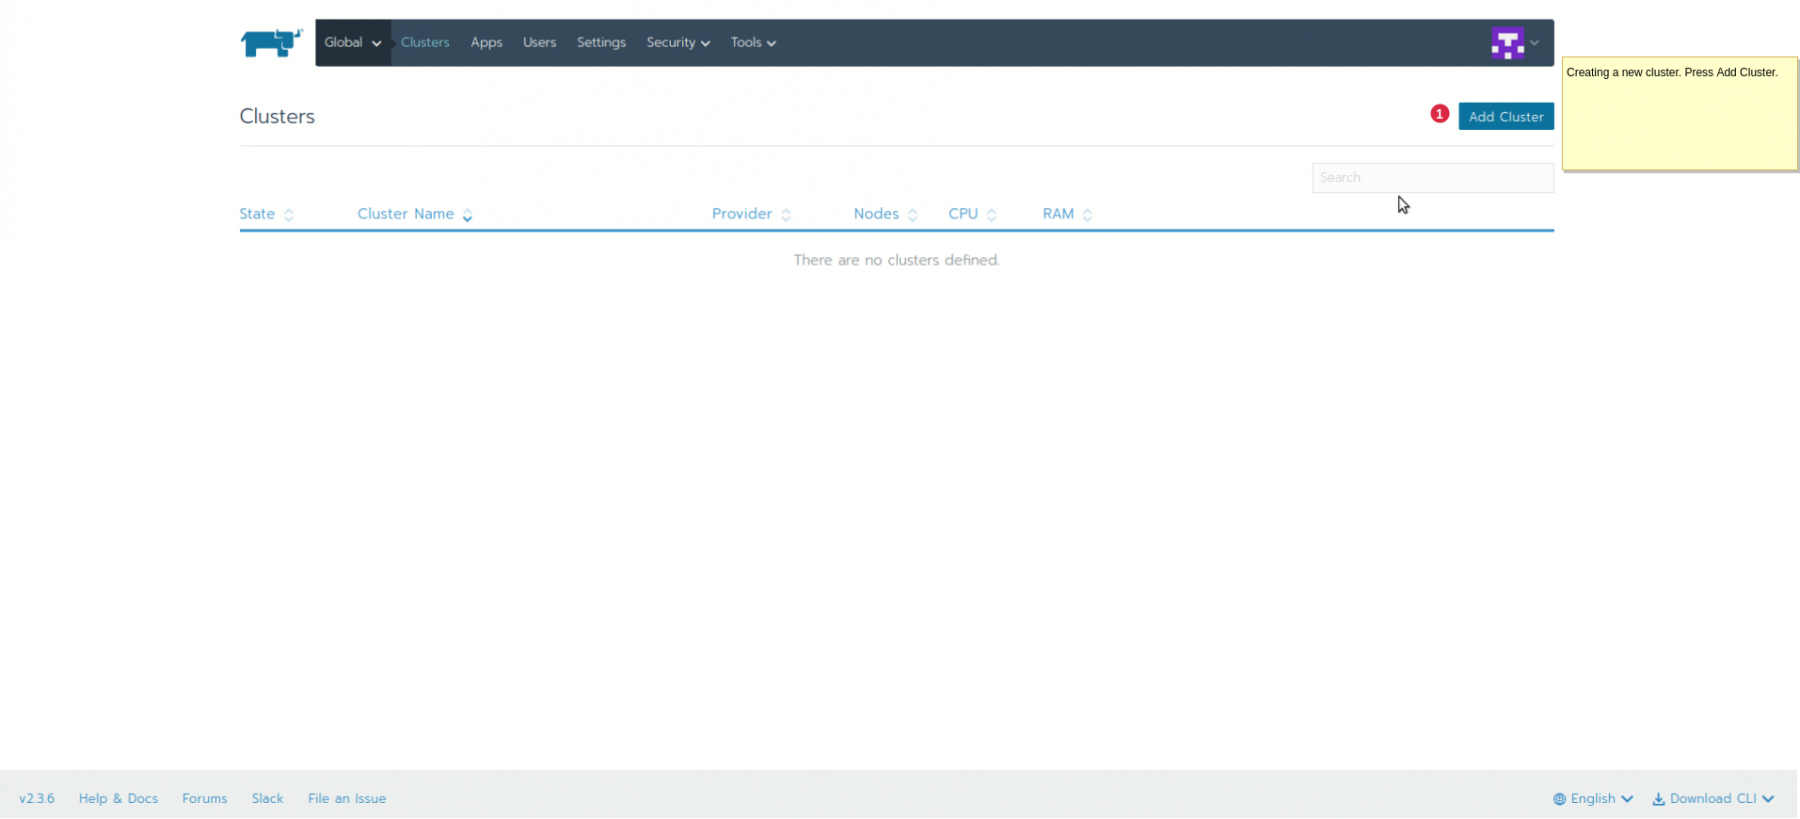 Create cluster
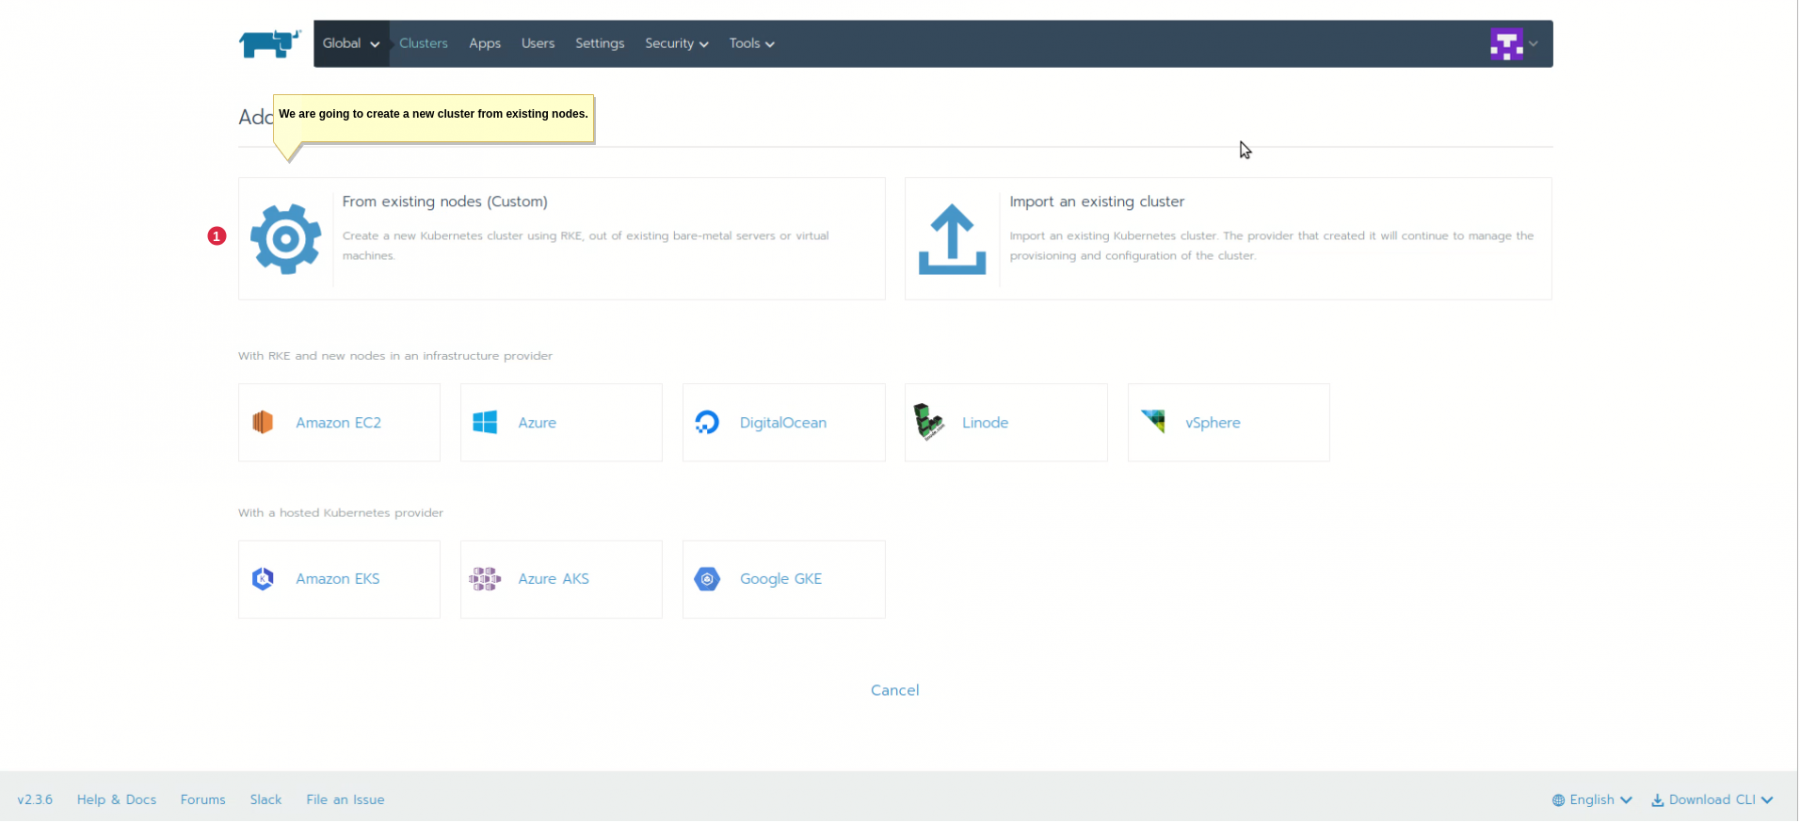 Create cluster
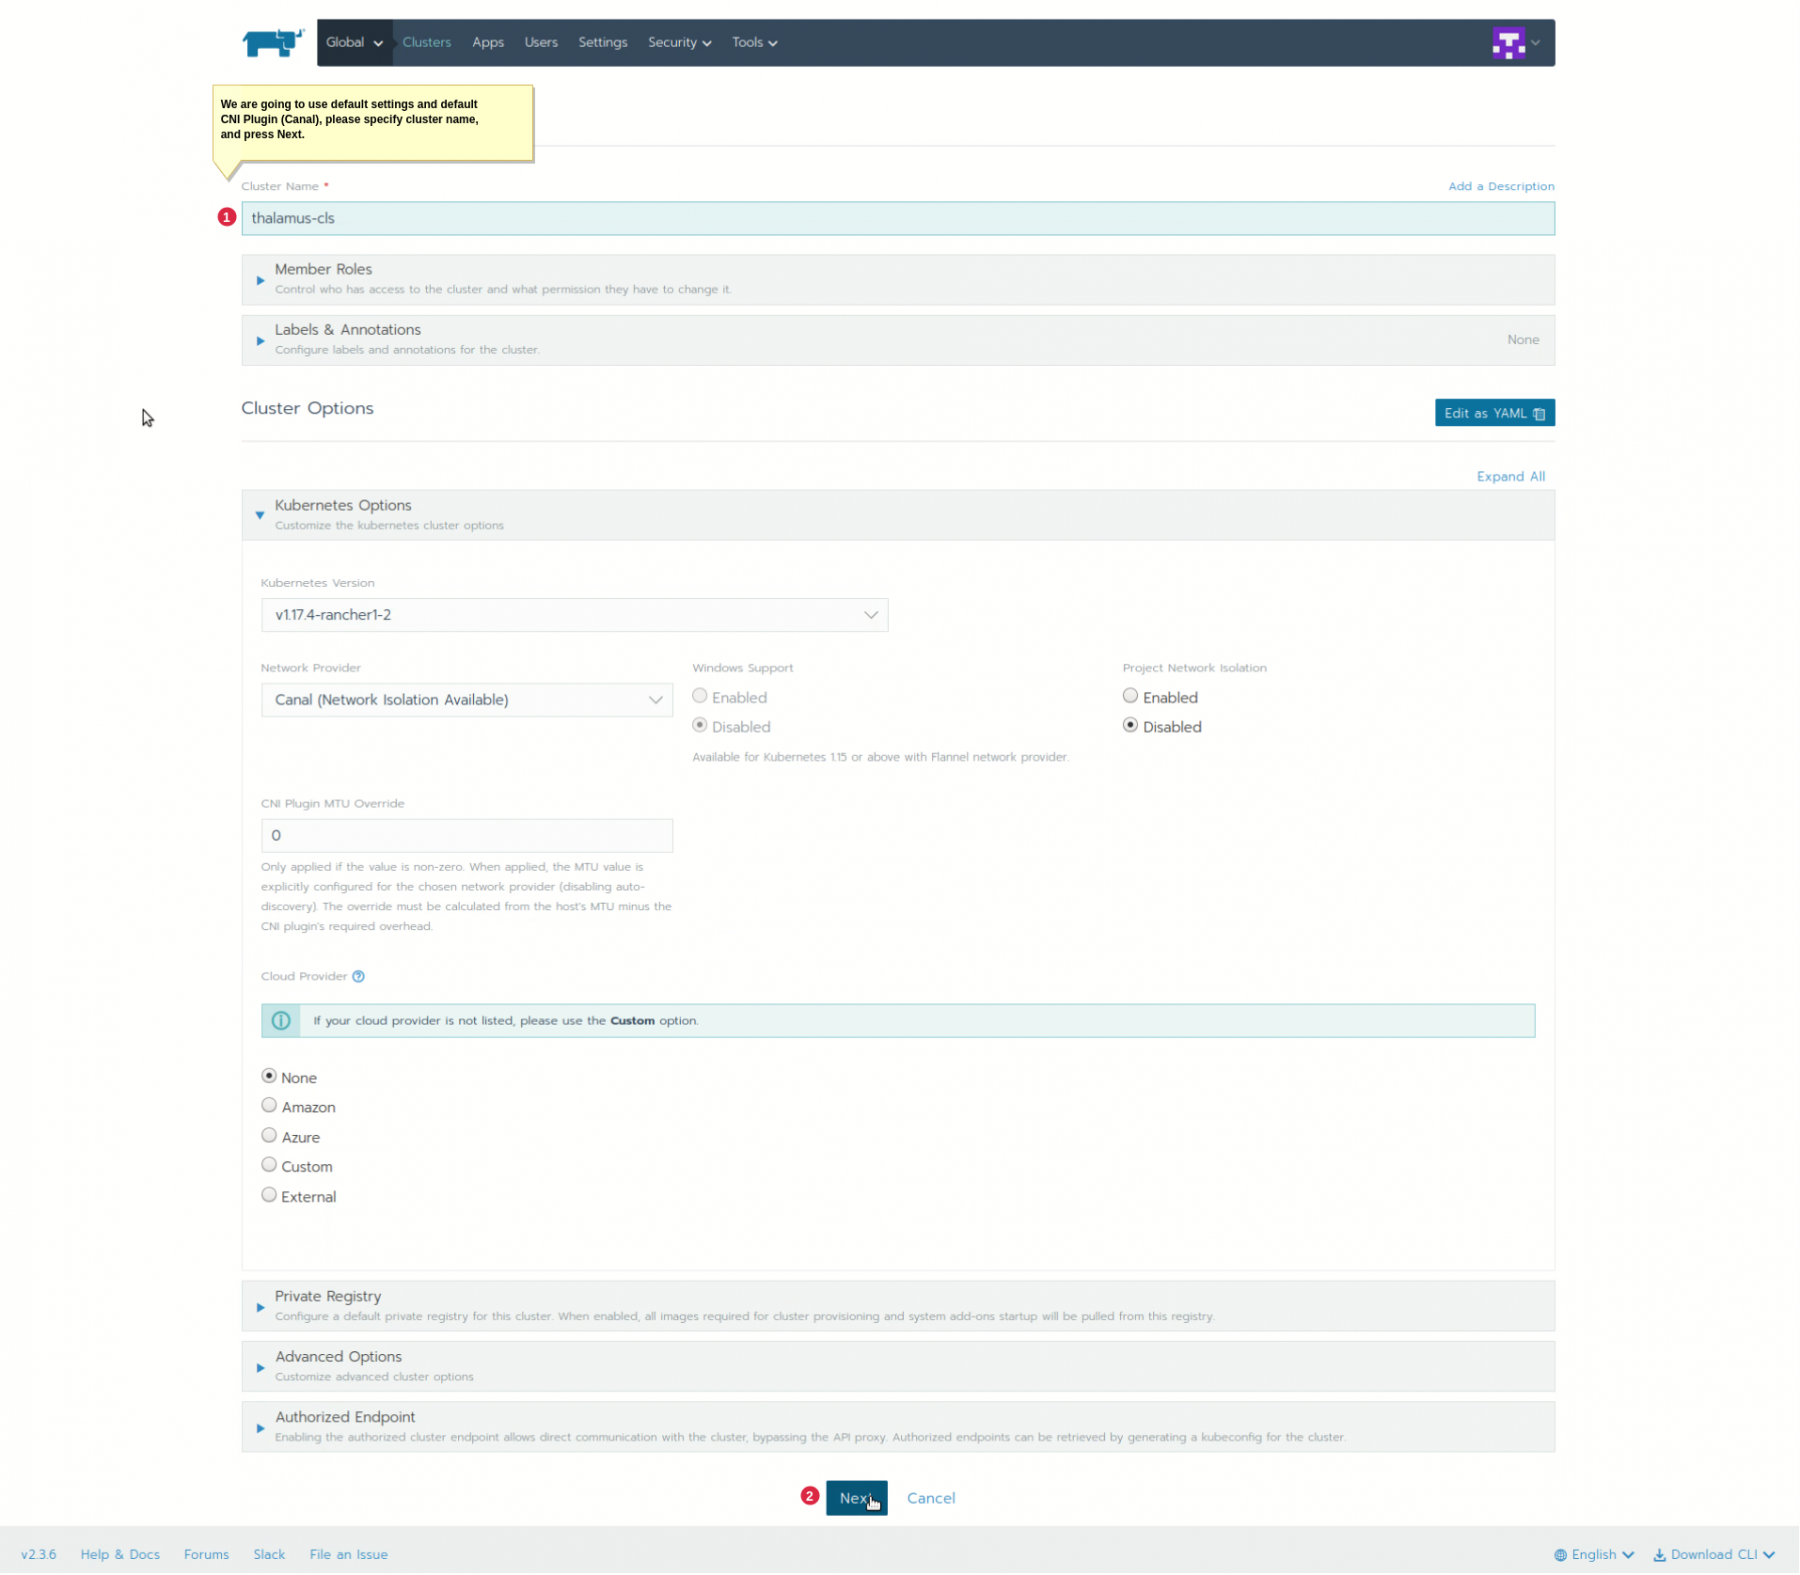 Specify cluster name
Choose the node roles from the table above. The registration command generated by Rancher belongs to that Rancher instance and cluster; don’t reuse a command copied from a screenshot.
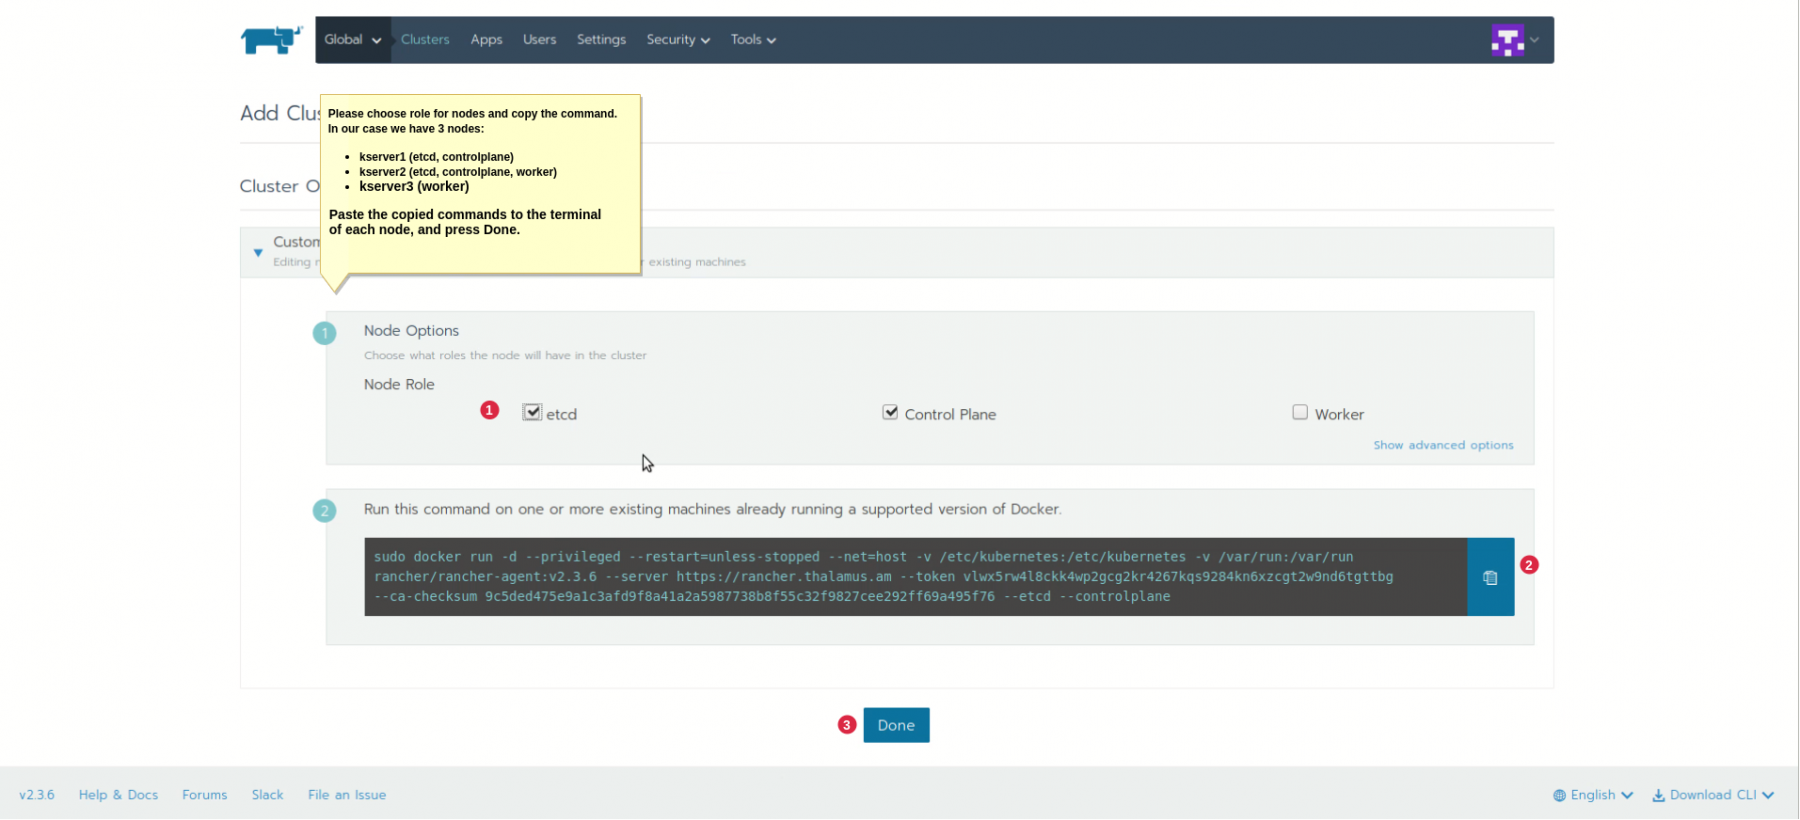 Choose cluster role
Once the nodes have registered, obtain the kubeconfig for the cluster:
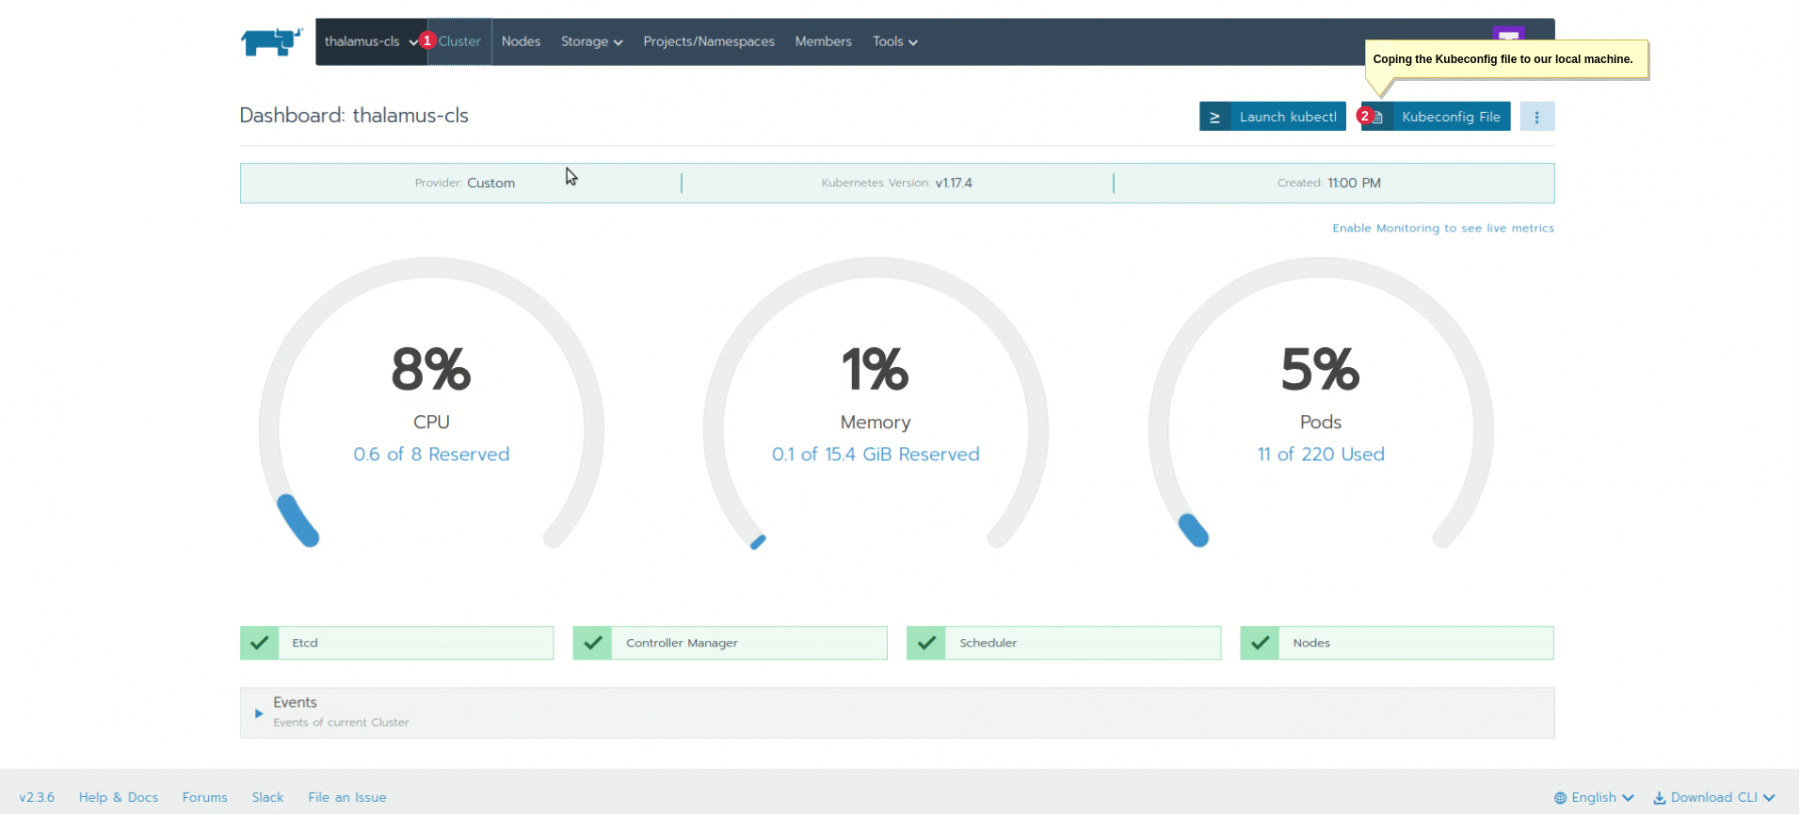 Copy kubeconfig file
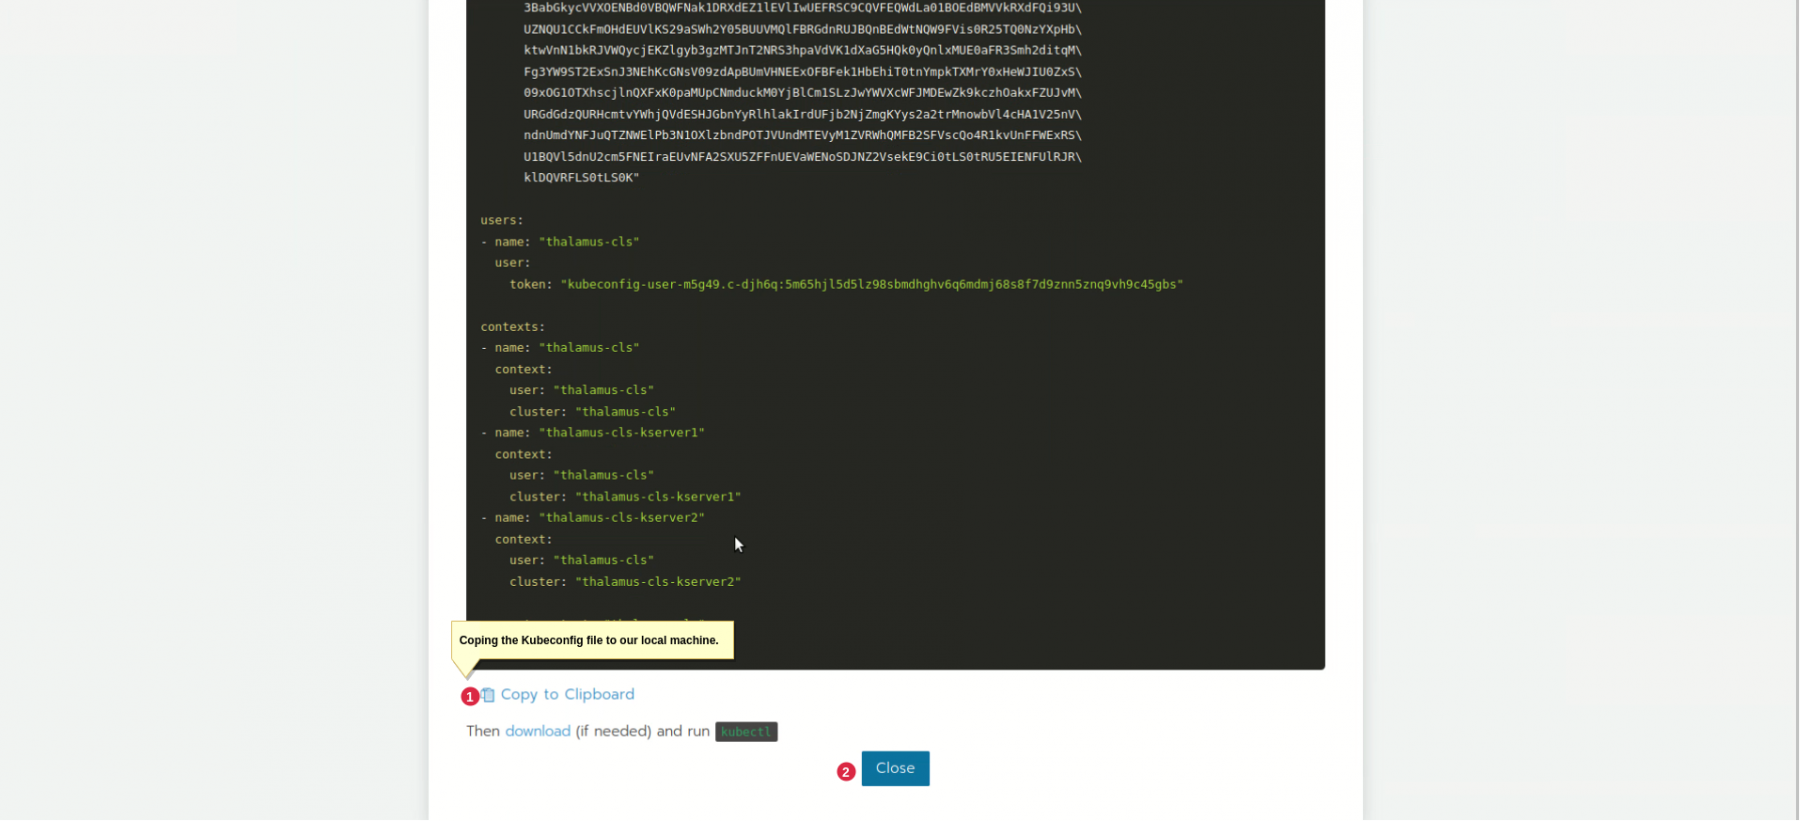 Copy kubeconfig file
Keep the kubeconfig private. From the machine where you configured it, check which cluster you are using and whether the nodes are ready:
kubectl config current-context
kubectl get nodes
Continue only when the context points to the lab cluster and all three expected nodes are Ready.
The TLS Secret must match the ingress configuration
The original demo generated a self-signed certificate and stored it in a Kubernetes Secret:
openssl req -x509 -nodes -days 1095 -newkey rsa:2048 \
  -keyout thalamus.key -out thalamus.crt

kubectl create secret tls thalamus-tls --cert=thalamus.crt --key=thalamus.key
This is incomplete as a reusable HTTPS example. The command does not explicitly set a hostname or a Subject Alternative Name. The OpenSSL request documentation shows how to set certificate extensions. A rebuilt demo needs a certificate with the intended DNS name and a browser that trusts its issuer. Keep the private key out of Git.
The Secret must live in the same namespace as the Ingress, which must reference thalamus-tls. You also need an ingress controller to handle requests. Check how the hostname and Secret connect in the Kubernetes Ingress documentation.
Inspect the application manifests before applying them
The demo used the Thalamus microservices repository. The original SSH clone command requires GitHub access through your SSH key:
git clone git@github.com:Thalamus-am/microservices-demo.git
cd microservices-demo/release/
The notes did not record a commit. Before repeating the deployment, inspect kubernetes-manifests-ingress.yaml at a specific revision. Check its API versions, images, namespace, ingress host, and TLS Secret reference. The repository’s current contents have not been revalidated for this article.
The historical deployment step was:
kubectl apply -f kubernetes-manifests-ingress.yaml
For a future lab run, check the workloads and service path after applying the reviewed manifest:
kubectl get pods
kubectl get services
kubectl get ingress
Use the application’s namespace if it differs from the current context. If the pods are ready but the browser cannot reach the application, follow the request from DNS to the ingress controller. Then check whether TLS presents the certificate you expected. A rebuilt version of this lab should show that last part working, including the checks used to get there.